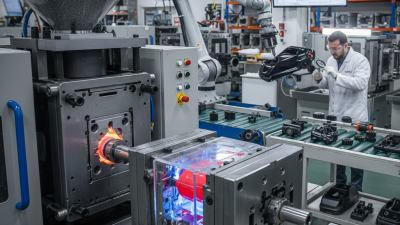
For global buyers, the injection moulding process is more than melting resin and filling a tool. It is a chain of decisions that affects quality, cost, delivery, and product risk. Resin selection, mold design, drying conditions, injection speed, cooling time, and inspection standards must work together. A small mistake can leave sink marks, flash, warpage, or weak weld lines on otherwise attractive parts.
John Bozzelli, a respected scientific-molding specialist and founder of Injection Mold Consulting, offers a practical reminder: “The part is telling you what is happening in the mold.” This insight matters during supplier audits and sample reviews. A short shot may indicate insufficient pressure, poor venting, or an unsuitable process window. A glossy surface may hide internal stress. Buyers should ask for measured evidence, not only polished samples and confident promises.
This guide presents ten injection moulding process tips for international purchasing teams. It covers material traceability, mold trials, process validation, dimensional control, packing, and communication across time zones. The details are practical. Picture a production floor at 7 a.m.: resin bags are labeled, the hopper is dry, cavity pressure is recorded, and the first-off parts are checked beside the approved drawing. That discipline builds trust.
Still, no supplier is perfect. Specifications can be incomplete. Forecasts can change. Even a validated process may drift after maintenance or material substitutions. Buyers should leave room for questions, independent inspections, and corrective action. The strongest partnership is not built on flawless claims. It grows through transparent data, repeatable methods, and the willingness to reconsider an assumption.
Before requesting an injection moulding quotation, define the product in measurable terms. Record dimensions, tolerances, wall thickness, surface finish, weight, and expected service life. Explain where the part will operate. Heat, moisture, chemicals, impact, and sunlight can change the material decision.
Do not select resin by price alone. Polypropylene may suit lightweight, flexible parts, while engineering plastics can support higher heat or mechanical loads. Ask for data on shrinkage, moisture absorption, stiffness, and impact resistance. Check whether the material supports food contact, electrical safety, or other required regulations. These requirements vary by market. A material that performs well in a factory sample may fail after months outdoors. That mistake is expensive.
Tips: Prepare a simple product requirement sheet before supplier discussions. Include annual volume, prototype quantity, target cost, colour, assembly method, and packaging conditions. Request a material datasheet and a sample evaluation plan. If tolerances are unusually tight, discuss tooling capability early. I have seen buyers specify a perfect-looking finish, then discover it hides flow marks poorly. Review the first mould trial carefully. Measure critical features, inspect weld lines, and test real-use conditions. Do not assume the initial sample proves long-term reliability. Allow room for revision.
| No. | Process Tip | Product Requirement to Define | Reference Data and Material Guidance | Recommended Buyer Check | Priority |
|---|---|---|---|---|---|
| 1 | Convert the product concept into measurable specifications | Define overall dimensions, tolerances, wall thickness, weight, surface finish, color, assembly method, and expected service life. | For many general-purpose moulded parts, dimensional tolerances are commonly set around ±0.10 to ±0.30 mm, depending on size, geometry, material, and tooling capability. Tighter tolerances require additional design and process control. | Issue a controlled 2D drawing and 3D CAD file. Mark critical-to-function dimensions separately from non-critical cosmetic dimensions. | High |
| 2 | Select material according to the operating environment | Identify load, impact, temperature, chemical exposure, moisture, UV exposure, electrical requirements, and food or medical contact conditions. | Typical continuous-use temperature ranges vary by grade: polypropylene is often used near 80–100°C, ABS near 70–85°C, and engineering polyamides may support higher temperatures. Confirm the specific grade data sheet before approval. | Request the exact resin grade, technical data sheet, safety documentation, and applicable compliance declarations. Do not approve material by generic family name alone. | High |
| 3 | Account for moulding shrinkage during tool design | Define expected shrinkage, dimensional stability, and the allowable variation between cavities and production batches. | Approximate moulding shrinkage ranges are 1.0–2.5% for polypropylene, 0.4–0.8% for ABS, and about 0.7–1.5% for unfilled polyamide 6. Actual values depend on grade, flow direction, wall thickness, packing pressure, and cooling. | Ask for the shrinkage values used in the tool design and require first-article measurements at room temperature after a defined conditioning period. | High |
| 4 | Keep wall thickness as uniform as practical | Prevent sink marks, voids, warpage, weld-line weakness, and excessive cycle time while maintaining required stiffness. | Common nominal wall thicknesses are approximately 1.5–3.0 mm for many thermoplastic parts. A transition ratio of about 1.3:1 or lower is often preferred between adjacent sections to reduce uneven cooling. | Use ribs, gussets, and proper geometry instead of simply increasing wall thickness. Review a mould-flow analysis for large, cosmetic, or highly constrained parts. | High |
| 5 | Design suitable draft angles and radii | Enable reliable ejection without scuffing, deformation, sticking, or damage to textured surfaces. | A common starting point is approximately 0.5°–1° of draft per side for smooth surfaces. Textured surfaces often require additional draft, frequently around 1°–3° or more depending on texture depth. | Confirm draft direction, texture depth, shut-off areas, minimum corner radii, and ejection locations in the tooling design review. | Medium |
| 6 | Specify drying requirements for moisture-sensitive materials | Prevent splay, bubbles, reduced strength, hydrolysis, and inconsistent appearance caused by excessive moisture. | Hygroscopic materials such as polyamide, polycarbonate, and certain polyester grades normally require controlled drying. Typical drying conditions may range from 80–120°C for several hours, but the resin supplier's grade-specific instructions take precedence. | Require moisture-control records, dryer temperature verification, storage in sealed containers, and a defined maximum moisture level before moulding. | High |
| 7 | Match gate and runner design to part geometry | Control filling balance, weld lines, packing, cosmetic appearance, and material waste. | Gate location should support balanced filling and place weld lines away from critical load areas. Hot-runner systems can reduce runner scrap, while cold runners may offer simpler maintenance and lower tooling complexity. | Review gate locations, runner balance, weld-line positions, gate vestige limits, and the expected material utilization before releasing the mould. | High |
| 8 | Define a realistic production cycle and capacity plan | Align annual demand, batch size, delivery schedule, machine capacity, number of cavities, and acceptable cycle time. | Total cycle time consists mainly of filling, packing, cooling, mould opening, ejection, and handling. Cooling commonly represents the largest portion of the cycle for thick or poorly cooled parts. | Calculate capacity using: parts per hour = cavities × 3600 ÷ cycle time in seconds. Include planned downtime, setup time, scrap, maintenance, and quality inspection time. | High |
| 9 | Set inspection methods and acceptance limits in advance | Define appearance, dimensions, mechanical performance, assembly fit, color, packaging, and sampling requirements. | Inspection may include calibrated dimensional equipment, visual standards under controlled lighting, tensile or impact testing where relevant, and functional gauges for assembly features. Sampling plans should be agreed before production. | Prepare an inspection specification covering measurement equipment, reference samples, defect classification, test frequency, record format, and nonconformance handling. | High |
| 10 | Validate the process before mass production | Confirm repeatability of dimensions, appearance, weight, cycle time, material usage, and functional performance. | Use a documented pilot run or process-validation batch. Record key settings such as melt temperature, mould temperature, injection speed, packing pressure, cooling time, cycle time, and part weight. | Approve production only after first-article samples meet the drawing and test requirements. Retain approved samples, process records, material batch information, and change-control procedures. | High |
Note: Material properties, shrinkage, processing temperatures, drying conditions, and tolerances vary by resin grade, part geometry, mould design, and machine settings. Use the selected material supplier's technical data sheet and validate all critical requirements through production trials.